

How to Make a Gift Hamper at Home: A Step-by-Step Guide for Beginners
Discover thoughtful handcrafted gifts for birthdays, weddings, anniversaries, and every special celebration.
There is something lovely about opening a gift and realising that someone has chosen every part of it with you in mind. A favourite snack, a useful notebook, a small accessory and a personal message can feel more meaningful together than an expensive item chosen in a hurry.
That is the appeal of a homemade gift hamper. You decide what goes inside, how much to spend and how the finished gift should feel.
You do not need professional wrapping skills or a table full of craft supplies to get started. A suitable box, a few well-chosen items and a little patience are enough. This guide explains how to make a gift hamper at home, from choosing a theme to checking that everything stays in place.
In this guide
- 1. Begin With the Person
- 2. Choose One Clear Theme
- 3. Decide Your Total Budget
- 4. Select the Contents Before the Box
- 5. Choose a Suitable Hamper Box
- 6. Gather Your Packing Materials
- 7. Build a Stable Base
- 8. Arrange the Largest Items First
- 9. Fill Gaps and Check Movement
- 10. Add a Personal Message
- 11. Finish and Prepare for Delivery
1. Begin With the Person
Before browsing for products, think about who will receive the hamper.
What do they enjoy? What do they use regularly? Is there something happening in their life that could guide your choices?
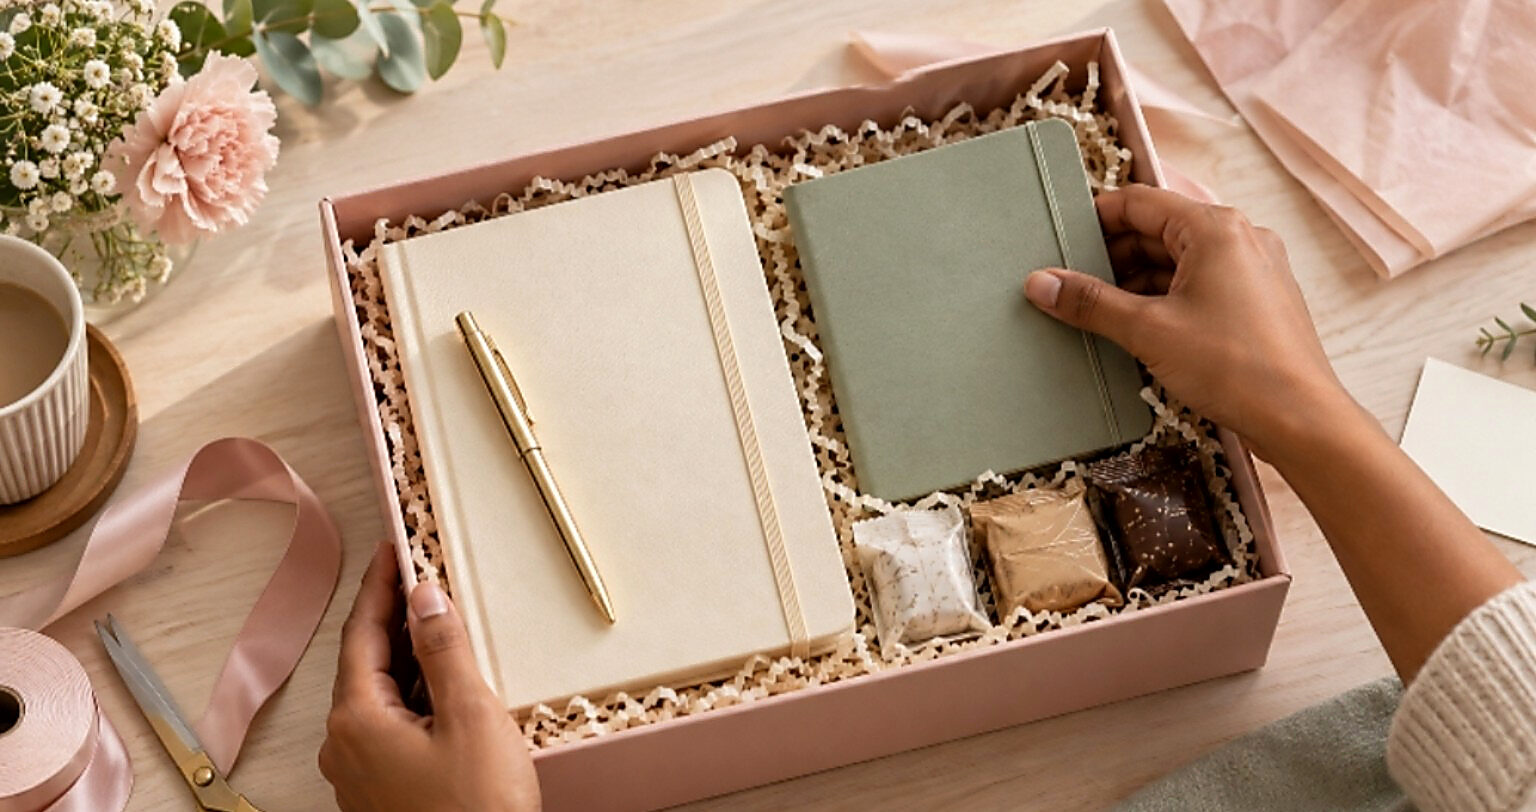
A friend starting college might appreciate stationery and a note of encouragement. Someone who enjoys journaling may love a diary, pens and a few simple accessories. A couple celebrating an anniversary might prefer a small collection of shared favourites.
Try to remember specific details. Perhaps your friend always carries a notebook, likes a particular colour or enjoys a quiet evening with tea.
Those observations give you a stronger starting point than buying several unrelated items simply because they look attractive together.
2. Choose One Clear Theme
A theme helps your hamper feel connected and makes shopping easier.
You could create:
1. A stationery hamper for someone who loves writing.
2. A birthday hamper built around the recipient’s favourite things.
3. A study hamper with useful desk accessories.
4. A thank-you hamper with a small keepsake and packaged treats.
5. An anniversary hamper with personal notes and shared memories.
Keep the theme flexible. Every item does not need to match perfectly, but each should have a reason to be there.
For a stationery hamper, for example, a diary can be the main gift, with a pen, calculator or bookmark supporting it. This feels more intentional than adding extra products just to fill the box.
3. Decide Your Total Budget
Set your budget before buying the contents.
Remember to include the box, filler, ribbon, card and any protective outer packaging. These small additions are easy to overlook.
One approach is to choose a main item first, then use the remaining budget for a few smaller additions and presentation materials. There is no need to fill every available space with another purchase.
If the budget feels tight, reduce the number of items rather than buying things the recipient is unlikely to use. A diary, a thoughtful note and one favourite treat can make a complete gift.
You can also keep the presentation simple. Carefully folded tissue and a neatly tied ribbon often provide all the decoration you need.
4. Select the Contents Before the Box
Arrange your chosen products on a table before buying the container.
This helps you see how much space they require and whether their shapes work together. A tall bottle, a flat notebook and a small jewellery box each need different support.
Keep products in their original packaging when that protects them or provides useful information. Measure the complete items, including their packaging.
For edible gifts, check ingredients, expiry dates and any known dietary preferences or allergies. Keep food sealed and avoid mixing it directly with scented products or loose decorative materials.
Do not include temperature-sensitive items unless you can store and deliver them appropriately.
A hamper should feel generous, but every item still needs to arrive usable and in good condition.
5. Choose a Suitable Hamper Box
Once you know the contents, select a box with enough internal space for the arrangement and any cushioning.
A shallow box can display smaller items neatly. A deeper box may suit taller products, although you will need to prevent smaller pieces from disappearing beneath them.
Check the material, base construction and closure. If you plan to carry the hamper by a handle, confirm that the handle is suitable for the finished weight.
Avoid choosing a very large box to make the gift appear more substantial. It can lead to unnecessary filler and make the contents look lost.
At Craft & Creations, you can browse gift boxes and packaging and compare the listed dimensions with your planned arrangement.
6. Gather Your Packing Materials
Before assembling the hamper, clear a workspace and gather everything you need.
Depending on your design, this may include tissue paper, suitable filler, ribbon, scissors, removable fixing materials and a greeting card.
You may also need protective sleeves or cushioning for delicate products. Keep these practical materials separate from purely decorative ones.
Avoid placing adhesive directly on delicate surfaces, product labels or gift items unless you know it can be removed safely. Do not use loose decorative materials where they could damage the contents or come into contact with unwrapped food.
Having everything ready makes the process calmer. You can focus on the arrangement instead of repeatedly stopping to search for scissors or another piece of ribbon.
7. Build a Stable Base
Start by checking that the box is correctly assembled.
If it arrives flat, follow its folding instructions and make sure the base is secure. Then add a modest layer of tissue or suitable filler.
The aim is to support the gifts, not create a soft mound that shifts every time the box moves. Heavy items should sit securely near the base.
If you need to raise a lightweight item for visibility, use a stable support that will not collapse under it.
Keep the height of the finished arrangement in mind. It is frustrating to create a beautiful display and then discover that the lid cannot close.
Test the fit as you work rather than waiting until the final step.
8. Arrange the Largest Items First
Place your main gift first, followed by the larger supporting pieces.
For an open display, taller items often work toward the back, with smaller products in front. For a lidded box, a flatter arrangement may be more practical.
Turn labels or attractive covers toward the recipient where possible. Leave enough space between items for them to be lifted out easily.
Step back occasionally and look at the whole arrangement. Is one corner crowded? Is something important hidden? Does the main gift stand out?
You may need to move things several times. That is normal. The first arrangement is simply a starting point, and small adjustments often make a noticeable difference.
9. Fill Gaps and Check Movement
Once the gifts are placed, add support where it is needed.
Fill empty spaces that allow items to slide, but avoid covering the gifts completely. Separate hard objects that could knock against each other.
Gently move the box a little to check the arrangement. You are looking for shifting, rolling or tipping, not testing it with force.
If a product moves, adjust its support rather than adding more decoration on top. Make sure nothing presses against a fragile item or forces the lid upward.
For a hamper that will be delivered by courier, you will need a suitable outer shipping package as well. A decorative box should not automatically be treated as transport protection.
10. Add a Personal Message
A handwritten message is often the part that makes a hamper feel personal.
You do not need to write a long letter. A few specific lines can say more than a generic greeting.
Mention why you chose the gift, recall a shared moment or offer encouragement for what comes next. For a friend starting a new job, you might write, “A little something for your new desk. I hope this next chapter brings you plenty to be proud of.”
Place the card where it can be found easily, rather than hiding it under the filler.
The message should sound like you. There is no need for elaborate language when a sincere sentence does the job.
11. Finish and Prepare for Delivery
Choose a simple finishing touch that suits the arrangement.
A ribbon around the closed box, a neatly attached tag or coordinated tissue can create a complete appearance. Avoid decorations that make the hamper difficult to open.
Before handing it over, check for price stickers, loose materials and damaged packaging. Confirm that the contents are secure and the lid closes properly.
If it is travelling, use suitable outer protection and keep it in conditions appropriate for everything inside.
Your finished hamper does not need to look like a shop display. Its charm comes from the choices you made for one particular person.
Start with a thoughtful selection, choose packaging that fits and give yourself time to arrange it. Those small decisions turn a box of products into a gift that feels personal.
Start your hamper with the right box
Pick a hamper box, gift bag or packaging that fits your contents.
Not sure what fits? Message us on WhatsApp and we will help you choose.

Article by
Craft&Creations
8 min read
Blog you may like
No approved comments yet. Be the first to comment!